Prerequisites
Before you start creating Automations, you must ensure that you have the following set up:
- Create a Contact Segment or a Form to initialize your Automation. If you already have an existing Segment or Form to use, ensure that they’re up-to-date.
- Create any custom field that you need for your Contact profile.
- Set up and configure any integration that you intend to use in your Automation.
- Set up appropriate channels such as Text Messages, Email, Focus items to communicate with your Contacts.
- Create Assets, Landing pages, or other Components that you want to use for your Automation. If using assets, ensure that you upload them before creating your Automation.
Create Your First Automation
After you have the prerequisites in place, you are ready to create your first Campaign.
To begin creating Automation, perform the following steps:
- Launch your Adaptix instance.
- Click Automations in the left navigation menu. The Automations list page appears.
- Click “+ New” on the Automations page. The New Automation wizard appears as shown in the following image .
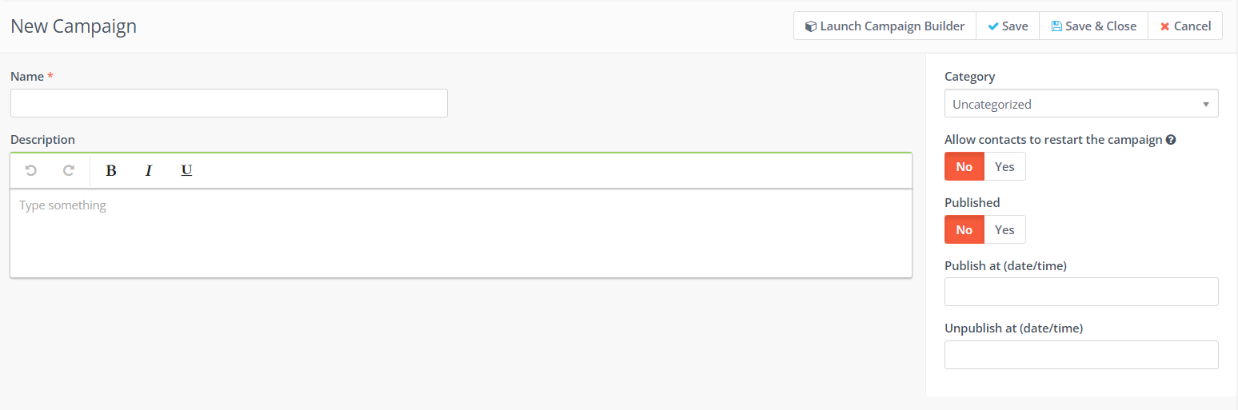
- Enter a name and a brief description for your Automation.
- Optionally, you can set the following properties:
- Category – Choose a category to assign your Campaign to. Categories help you organize your Automations. To learn more about creating and managing categories, see Categories.
- Allow contacts to restart the Automation – Click the toggle switch to allow Contacts to restart the Automation if you’re building a Automation for a recurring message (birthdays, subscriptions) or transactional operations (activity notifications, updating data). Enabling this option allows Contacts to go through the same Automation multiple times.
- Published – Click the toggle switch to publish or unpublish the Automation. Ensure that you do not publish a Automation until you’re actually ready for it to go live. You can also schedule to publish or unpublish a Automation at a future date by selecting a time and date.
- Click Launch Automation Builder to start building your Automation, and add at least one event. For information about how to use the Campaign Builder, see Using the Automation Builder.
- After adding events to your Automation, close the Automation Builder and click “Save & Close” to save your changes.